
How to Draw Verity from Minecraft: Shape and Expression
For a simple normal-form Verity drawing, build a yellow circle around two upright black oval eyes and an upward-curving smile. For the long-limbed monster interpretation, Art Land’s tutorial starts with the eyes and grin, then adds the head, narrow body and arms.
Updated
Choose a form before sketching

The normal face and the monster are different drawing tasks. Pick one reference before borrowing features: a toothy grin and a ribbed humanoid body do not belong to the simple ball reference shown here.
Use paper, a pencil for light construction, a black marker and yellow coloring tools if you want the normal palette. Those are practical drawing choices; they do not establish a canonical physical size.
Draw the normal round face
- Sketch a light circle, leaving room around it so its outline stays complete.
- Place two upright oval eyes above the center. Keep them aligned and check the spacing before filling them black.
- Draw a broad upward-curving smile below the eyes. In this reference it is a dark curved band with small upturned ends, rather than an open mouth full of teeth.
- Refine the circle, erase construction lines and fill the face yellow. Keep the eyes and smile black.
This is an editorial construction method based on the visible reference, not an official character-design sheet. Check the finished silhouette first: a round yellow face, two dark ovals and a clear curved smile should read without extra details.
Follow the monster lesson
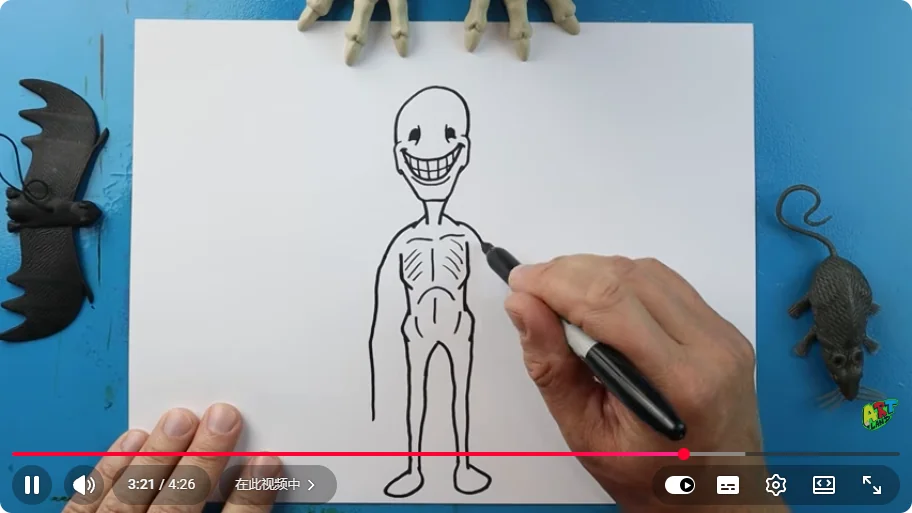
Art Land’s original lesson builds its humanoid version from the face outward. Start with the lower eye curves, complete the eyes, and place the wide grin. Divide the grin into teeth, then add the jaw and rounded top of the head.
Extend the neck into a narrow chest. Add curved rib lines, a slim waist and hips, then long legs and feet. Carry the arms down alongside the body and finish the long fingers. Compare the arm length with the torso before darkening the final outline.
The viewed later frame shows yellow coloring on the completed figure. Follow the actual lesson for its drawing proportions; no fixed height or exact finger-to-body scale is inferred from a thumbnail. For ready-made line art, continue to printable choices.